

WP Multibyte Patchって本当に必要?どんなプラグインなの?
今回はこのような悩みに答えていきます。
- WP Multibyte Patchの必要性
- WP Multibyte Patchを導入しないで日本語を使用すると起こる不具合
- WP Multibyte Patchのインストール方法と使い方
プラグインは入れすぎると不具合を起こしたりサイトが重くなったりするので、本当に必要なプラグインしか導入したくありませんよね。
WordPressのおすすめプラグインで検索すると、よく目にするプラグイン「WP Multibyte Patch」は不要なのか?それとも必要なのか?
安心してください『WP Multibyte Patch』は不要なプラグインではありません!
結論から言うと、日本語のブログを運営するならほぼ必須のプラグインです。
本記事では、日本語のブログを運営するなら必ず導入しておきたいWordPressプラグインの1つ「WP Multibyte Patch」について解説していきます!
WP Multibyte Patchとは?
「WP Multibyte Patch」とは、日本語を使用した際に起こる不具合やエラーなどを修正・強化してくれるプラグインになります。
「WP Multibyte Patch」は、日本語ブログを運営していく上で、とても心強いプラグインです!必ず導入しておきましょう!
元々はWordPressインストール時にデフォルトのプラグインとして標準で付属されていましたが、WordPress5.0以降は付属されなくなりました。
そのため、今では「WP Multibyte Patch」を手動でインストールする必要があります。
「WP Multibyte Patch」が必要な理由やインストール方法は順番に解説していくので安心してくださいね!
WP Multibyte Patchが必要な理由
『WP Multibyte Patch』はなぜ必要なの?
簡単に説明すると、日本語の使用で起こる文字化けなどの不具合を起こらないようにしてくれるからです。
なぜ日本語を使用すると不具合が起こるのですか?
それでは、なぜ不具合が起こるのか一緒に見ていきましょう。
WordPressはアメリカで開発されたソフトウェアなので、シングルバイト文字(1バイト)である英語が基準となっています。
そのため、マルチバイト文字(2バイト以上)の日本語の平仮名や漢字を使用すると、文字化けなどの不具合を起こす可能性があるのです。
シングルバイト文字 : 1バイトで表現できる文字 (半角文字)
マルチバイト文字 : 2バイト以上で表現する文字 (全角文字)
引用元 : 「分かりそう」で「分からない」でも「分かった」気になれるIT用語辞典
「WP Multibyte Patch」は英語を基準に作られたWordPressで、日本語を使用しても不具合やエラーが起こらないように最適化してくれるプラグインになります。
『WP Multibyte Patch』を導入・有効化しないで日本語を使用すると起こる不具合は以下の通りです。
- 日本語メール送信時の文字化け
- トラックバック・ピンバック時の文字化け
- 日本語ファイル(画像などのメディアファイル名)のアップロードによる文字化け
- ブログの記事検索で全角スペース入力に伴うエラー
- サイト移転時のトラブル
「WP Multibyte Patch」は導入して有効化するだけで、上記のような不具合を解消または未然に防いでくれます!
WP Multibyte Patchのインストール方法と使い方

それでは、WordPressプラグイン「WP Multibyte Patch」をインストールしていきましょう!
WP Multibyte Patchのインストール手順
- 管理画面で「プラグイン」⇒「新規追加」をクリック
- 検索窓に「WP Multibyte Patch」と入力
- 検索結果一覧に「WP Multibyte Patch」があるか確認
- 「今すぐインストール」をクリック
- 「有効化」をクリック
- 「プラグインを有効化しました。」と表示されたら完了
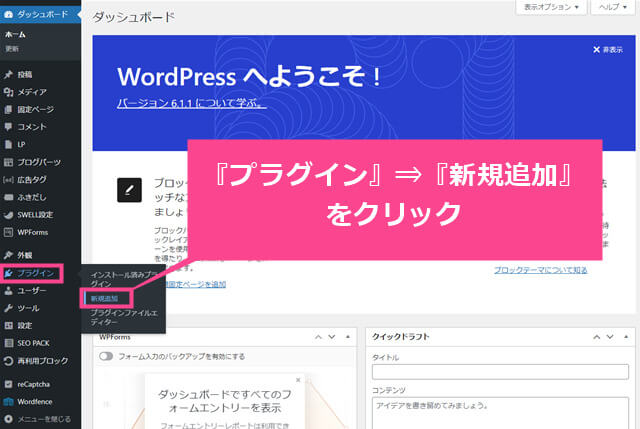
まずは、管理画面で「プラグイン」⇒「新規追加」をクリックしてプラグイン追加画面に移動します。
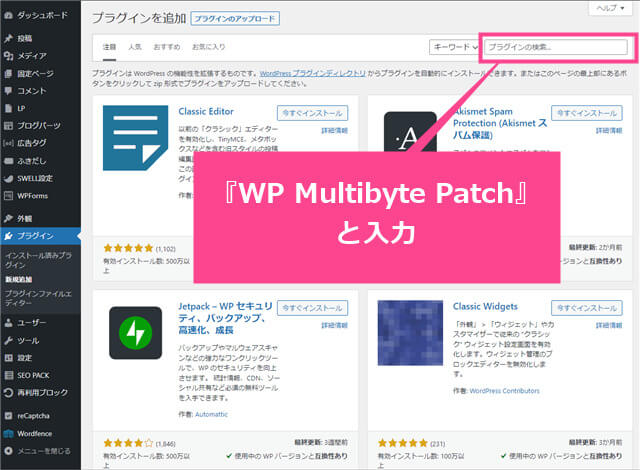
プラグイン追加画面が開いたら、検索窓に「WP Multibyte Patch」と入力してください。
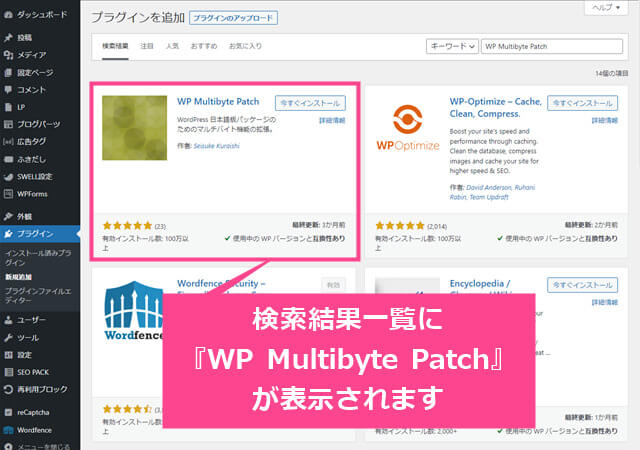
すると、検索結果一覧に「WP Multibyte Patch」が表示されます。
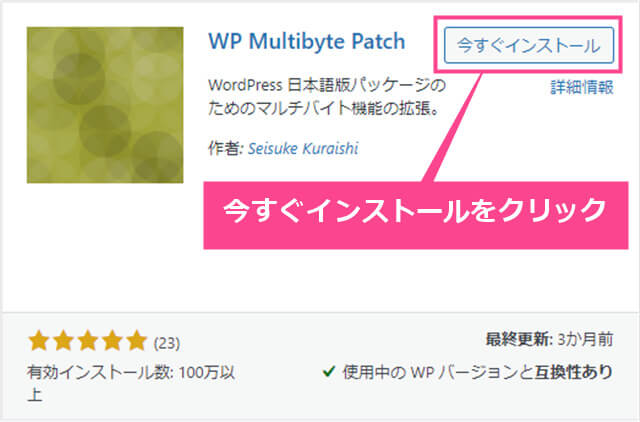
「今すぐインストール」をクリックして「WP Multibyte Patch」をインストールしましょう。
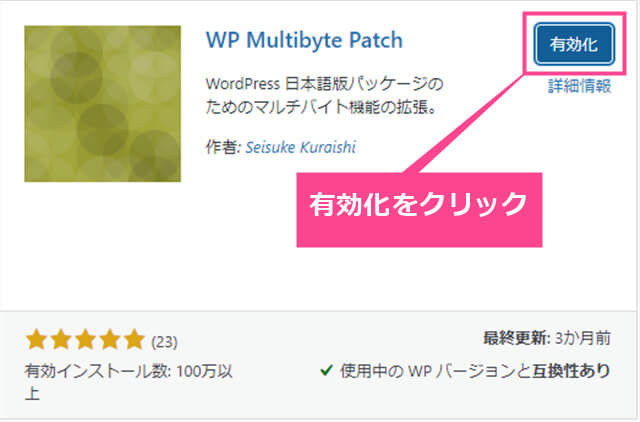
インストールが完了したら、「有効化」をクリックします。

「プラグインを有効化しました。」と表示されたら完了です。
「WP Multibyte Patch」のインストール手順は以上となります。おつかれさまでした!

えっ……終わっちゃうんですか?まだ設定方法や使い方を聞いてないんですけど?
安心してください!「WP Multibyte Patch」は、インストールして有効化すればあとは自動で機能してくれます。

インストールして有効化だけでいいなんてすごく簡単ですね!
「WP Multibyte Patch」は簡単に導入できて、とても頼りになるプラグインなんです!
WP Multibyte Patchとは?不要か必要か?設定や使い方を解説!まとめ

今回は、「WP Multibyte Patch」について解説してきました。
冒頭でもお伝えしましたが、日本語ブログを運営するならほぼ必須のプラグインです!
- 日本語メール送信時の文字化け
- トラックバック・ピンバック時の文字化け
- 日本語ファイル(画像などのメディアファイル名)のアップロードによる文字化け
- ブログの記事検索で全角スペース入力に伴うエラー
- サイト移転時のトラブル
「WP Multibyte Patch」はインストールして有効化するだけで、上記の不具合やエラーを解消または未然に防いでくれるプラグインです!
迷っているなら導入することをオススメします。
今回は以上となります。最後までお読みいただきありがとうございました!